610-247-5116
Getting Started with Workphaze
Creating Jobs and Scheduling Work

Click on the Job Schedule item in the main menu
1.

Click the New Job button
2.
Select a Contractor for the job
-
If your company is the contractor, select your company from the list
-
If you do not see the contractor in the list, search using the search control
-
If the contractor is not in the list, you can add the contractor using administration>contractors (please see Administration in this guide).
3.


Enter or Select a Customer
4.

The Job Template displays as shown below
5.

Expand a job phase by clicking any of the blue down arrows
6.

Expand all job phases by clicking the black arrow at the top of the page
7.

Add the job details for the job by entering or selecting values in the fields for each job phase in the job
8.

Close the job by clicking the X in the upper right corner of the job screen. Don’t worry, all your entered data is automatically saved.
9.
Create and Schedule Job Tickets
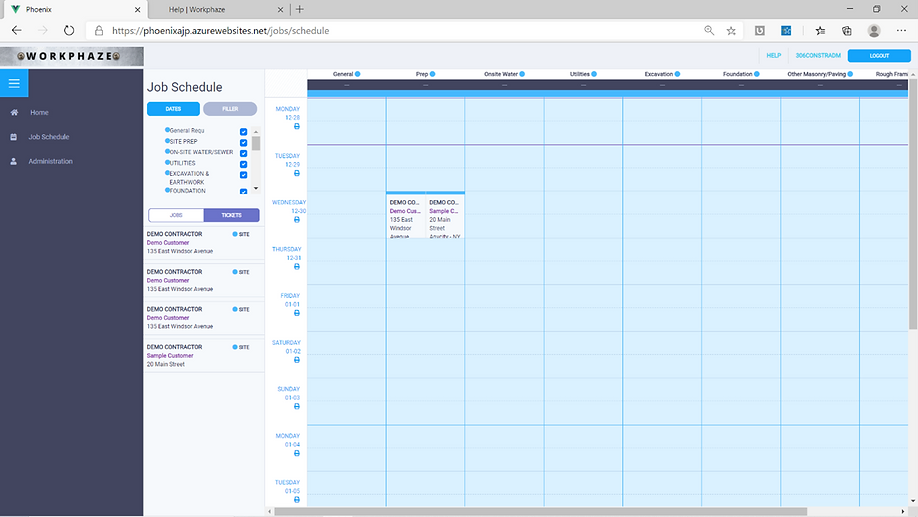
Example: In the schedule below, a ticket has been scheduled for the Demo Customer job on Wed, 12/20 for the Prep crew


Note: tickets represent a unit of work, usually 1/2 or 1 day of work for a crew

Example: In the schedule below, two tickets have been scheduled for the same crew on the same job. This means the crew will split the work between the two jobs for that day.

Create Job Tickets by entering the number of tickets for each phase in the job screen
1.

Job Tickets appear in the Parking Lot and are ready for scheduling
2.

Schedule Tickets by dragging tickets from the parking lot onto the schedule
3.
_edited.jpg)
Tickets can only be dropped on crew columns that match the phase of the ticket
4.